The thing about maintenance is that nobody wants to do it or pay for it. Consequently, refrigeration coils get neglected, fryer intakes get sooty, operating costs go up, efficiency goes down and life cycles get shorter. When it comes to kitchen ventilation, the costs—which can include fires—are even higher.
Daily And Weekly Care
If you get a good, consistent daily and weekly program going, you’ll get quality service from your hood, and if its condition changes, you’ll be more likely to spot it before a problem becomes a full-blown failure.
The main thing is to follow your manufacturer’s directions, whatever they are. But in general, they’ll look something like this:
First, wipe all of the grease from the exposed metal surfaces on the hood interior using a clean, dry cloth once a day. Wiping down at closing is best so grit and grease don’t coat surfaces overnight. Be careful while you’re doing it: Rubbing gritty particles can scratch the metal surface, leaving it more prone to future accumulation.
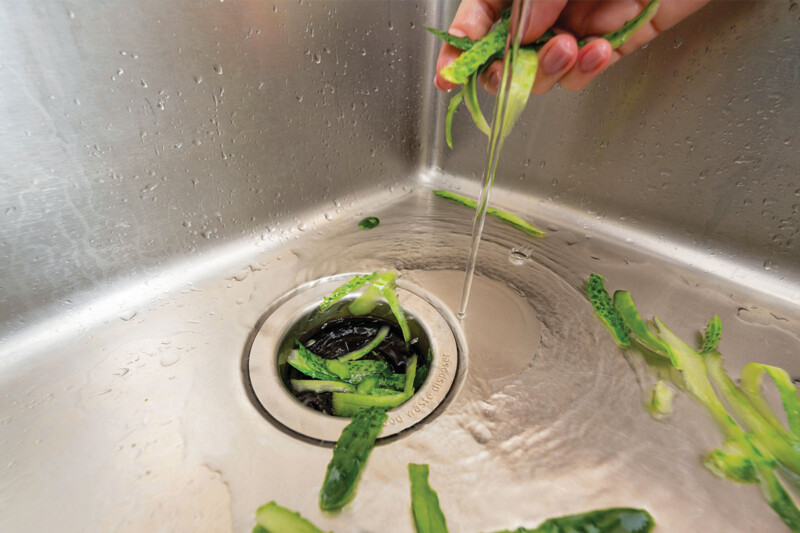
Cleaning the filters/cartridges is an extremely important task not only for sanitation, but also because clogged filters can cause other problems as well. They can interfere with proper exhaust flow, and they also result in more grease collecting in the ductwork, creating a serious fire hazard.
“Don’t wait until the filters are black and crusty to clean them,” one manufacturer advises. Check them daily for grease accumulation, and clean them as necessary. If there’s a heavily used grill or charbroiler below, that’ll be daily. For lighter cook loads under the hood, it’ll be weekly. Take the filters down and wash them in the warewasher or soak sink.
When that’s not practical, for whatever reason, “there are services that will take them out, replace them with temporary filters/cartridges, steam clean them and bring them back,” he says. “Be careful what type and quality of filters they replace yours with, as static pressure—and, therefore, exhaust capabilities—could change.”
Also, check the grease drain and remove, empty and replace the grease cup at least once a day or maybe more often based on what you’re cooking.
Again depending on how much grease your operation generates, you’ll want to wash the inside of the hood canopy with a grease-cutting, noncaustic cleaner daily or every few days. One manufacturer recommends you dilute 1/2 cup of laundry detergent with 1 gal. of warm water. Soak a clean cloth in the wash water, wring out the excess and wipe hood surfaces in the direction of the grain. Rinse the cloth frequently so you’re not just smearing grease. Then, use a different clean cloth soaked in clean, warm water to wipe down the hood surfaces and remove any detergent residue. Finally, wipe the surfaces dry with a fresh, clean cloth.
General Periodic Maintenance
Once the daily and weekly tasks are covered, you need to keep an eye on other things as well, including the hood exterior. Manufacturers we contacted said painted hood exterior surfaces should be cleaned as needed with a mild detergent solution for sanitation and appearance purposes, and stainless exteriors should be cleaned the same way as the interiors. Additionally, from time to time you’ll want to polish the interior and exterior with a good stainless polish. (Note: All manufacturers warn against abrasive cleaners, chlorine-based cleaners and iron wool pads—they damage stainless. They all emphasize rubbing with the grain to avoid leaving wipe marks.)
There’s more to life than just the hood, of course. So every once in a while you’re going to have to get farther up into the system, even up on the roof. Or you’ll have to hire a reliable, professional servicer to get up there and do a thorough cleaning and equipment check.
“Because the fan is where all the work is done in a hood, get up on the roof periodically and check the fan belts,” one maker says. If your system doesn’t have belts, check the drive system. Depending on use, the belts or drive system should be checked quarterly, but research the manufacturer’s recommendations and code requirements in your area. You’re looking for fan belts that are worn or frayed. “It’s a little bit of a chore to change them, but who wants the fan belt to break in the middle of a meal service?” he asks.
“If the system has a makeup-air unit, check to make sure the filters and fan belts are cleaned and in good shape. A broken belt or clogged filter can cause extreme pressure changes in the kitchen and building,” he says, leading to air-balance problems, such as doors that are too difficult to open. With or without a dedicated makeup-air unit, check all of the intake and exhaust openings to make sure they’re free of debris. While you—or your servicer—are at it, be sure to check the motors and electrical connections for weathering, wear and loose connections.
A Word On Ductwork
And then there’s the exhaust ductwork. At a minimum—which means very low-volume foodservice operations—you should have your ducts cleaned by a reputable, professional service once a year. If you have a menu that generates a fair amount of grease, you’ll need to do it more often; many manufacturers and servicers recommend a quarterly servicing or, if you’re burning solid fuel, a monthly cleaning.
Bottom line: Too frequent is better than not frequent enough. A grease fire is a risk you can’t afford to take.
RELATED CONTENT
- Advertisement -
- Advertisement -
- Advertisement -
TRENDING NOW
- Advertisement -
- Advertisement -
- Advertisement -